Category: Teaching
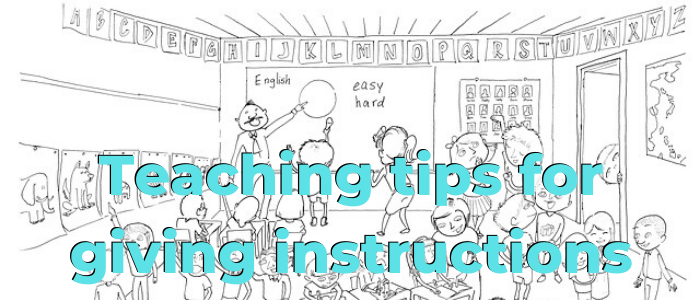
Giving clear and concise instructions is a vital step in becoming a good teacher. If you don’t give clear instructions, soon you will realize that almost everyone in the classroom is confused. This situation can lead to lesson success or fail. So, here are some tips:
1. Make sure you have the attention of the entire class before giving instructions
Before you start giving your instructions, make sure you have everyone’s attention. Wait until all the students stop talking, are seated, calm, and ready to listen to.
Before you start giving your instructions, make sure you have everyone’s attention. Wait until all the students stop talking, are seated, calm, and ready to listen to.

2. Use concise and specific commands
Instructions must be kept as simple as possible and they must be logical.
For example:
Instructions must be kept as simple as possible and they must be logical.
For example:
- Now, I want you to get out a piece of paper and put it on your desk. Once the paper is on your desk, could you please write down five sentences about what you did last weekend? (Wordy commands)
- Please, take a piece of paper, and then write down five sentences about what you did last weekend. (Concise commands)

3. Give instructions one at a time
Try not to give students too much information at once. Especially for kids who have attention challenges, try to avoid giving a series of instructions. Instead, create a step by step outline.
Try not to give students too much information at once. Especially for kids who have attention challenges, try to avoid giving a series of instructions. Instead, create a step by step outline.

4. Grade your language
Make sure that you can explain students within the limits of the language which the students can understand. Giving instructions filled with idioms and not common phrases to a group of lower-level learners will destroy their confidence. Instead, speak slowly and clearly with short sentences that convey exactly what you want them to do.
Make sure that you can explain students within the limits of the language which the students can understand. Giving instructions filled with idioms and not common phrases to a group of lower-level learners will destroy their confidence. Instead, speak slowly and clearly with short sentences that convey exactly what you want them to do.
For example:
- Get into pairs – You two, you two and you two.
- Pick out - Choose
- Let’s go over the answers – Now, check the answers
- Fill in – Complete
- Come up a poem – Invent a poem
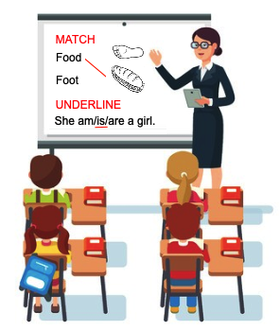
5. Illustrate or demonstrate the meaning
With lower-level learners, you may need to demonstrate what you want them to do, along with verbal instructions. Use the whiteboard to illustrate the meaning of such words as choose, underline, and match.
With lower-level learners, you may need to demonstrate what you want them to do, along with verbal instructions. Use the whiteboard to illustrate the meaning of such words as choose, underline, and match.
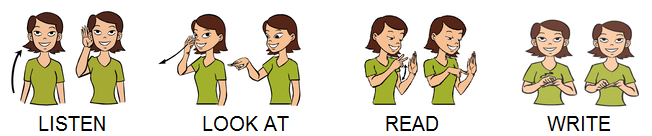
6. Use sign language and gestures as support
Incorporating nonverbal communication and gestures is an effective way to maximize time for teaching and learning. Sign language can enhance the learning process by bringing visual, auditory and kinesthetic feedback to help reach all students.
Incorporating nonverbal communication and gestures is an effective way to maximize time for teaching and learning. Sign language can enhance the learning process by bringing visual, auditory and kinesthetic feedback to help reach all students.
7. Ask politely rather than barking orders
The tone of voice can change everything, especially when telling someone what to do. Speak at a reasonable volume and use kind respectful words.
Try to avoid imperative such as “listen to me” or “stand up”, we don’t use them in “real life”. Instead, be polite and use request forms such as “Could you please stand up?” and “Can you please listen to me?”.
8. Give students a time limit
Before you start an activity, let students know how much time they will have. This helps students stay focused on the task and manage their time.
Before you start an activity, let students know how much time they will have. This helps students stay focused on the task and manage their time.
9. Offer the students the opportunity to ask questions
Get your students truly engaged by giving them opportunities to ask questions about the activity. The better they understand what to do, the greater chance for a successful outcome.
Get your students truly engaged by giving them opportunities to ask questions about the activity. The better they understand what to do, the greater chance for a successful outcome.

10. Check for students understanding
Always check that students have understood your instructions before starting the activity. The question “Do you understand?” is as good as useless. Students may be too shy to admit that they don’t understand or may think they understand when they don’t.
Always check that students have understood your instructions before starting the activity. The question “Do you understand?” is as good as useless. Students may be too shy to admit that they don’t understand or may think they understand when they don’t.
Instead of asking, “Got it?” or, “Do you understand?” You can use the following check questions:
- “How many sentences do you need to write?
- “How much time do you have to complete the activity?”
- “Who is the winner?”
- “If you are “A”, what are you going to do?”
- “What three rules do you need to remember?
11. Monitor the activity
If you find that all or most students are off track, stop the activity and give instructions to the whole class again. If only a few students need help, you can assist them individually or in their groups while the rest of the class continues with the activity.
If you find that all or most students are off track, stop the activity and give instructions to the whole class again. If only a few students need help, you can assist them individually or in their groups while the rest of the class continues with the activity.
12. Time to reflect
After the class, reflect on your instructions.
After the class, reflect on your instructions.

Leave your comments and let me know what potential difficulties your students might have with the following instructions. I look forward to reading your ideas.
